In this drawing lesson, you will learn how to draw a car step by step. This simple instruction will consist of six steps.
For more drawing videos, you can visit my youtube channel: Easy Drawings.
Drawing a car can be a fun and challenging endeavor.
It requires attention to detail, patience, and a bit of practice. However, with the right techniques and a step-by-step approach, anyone can learn how to draw a car.
In this article, we will go through the process of drawing a car from start to finish, highlighting important techniques and tips along the way.
Whether you are a beginner or an experienced artist, you will find valuable information in this guide that will help you improve your skills and create a realistic and detailed illustration of a car.
From sketching out the basic shape of the car to adding the final details, we will cover all the essential steps in the process. So, grab a pencil and paper, and let’s get started on drawing a car!
Materials
- Pencil
- Paper
- Eraser
- Coloring supplies
Time needed: 30 minutes.
How to Draw a Car easy
- STEP 1
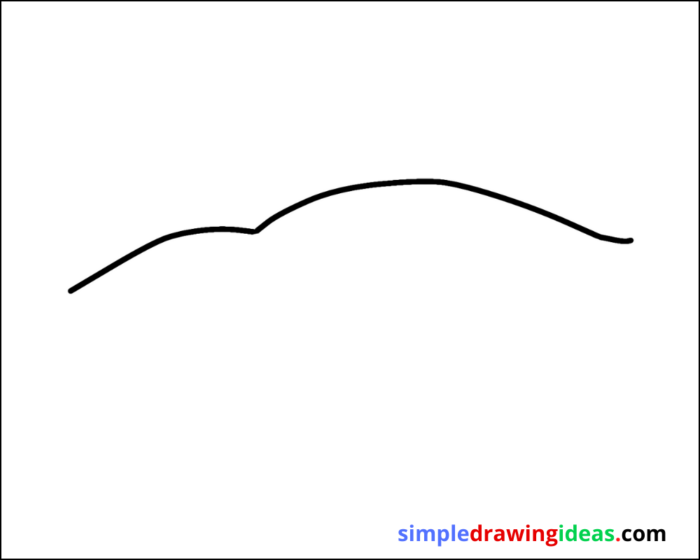
To draw the roof of the car, you can follow these steps:
draw the outline of the roof.
The roof of a car typically has a curved or sloping shape, so be sure to pay attention to the proportions and make sure that the roof looks realistic.
Next, add details to the roof. If the car has a sunroof or a moonroof, draw it in.
If the car has a built-in antenna, add that as well.
Make sure to pay attention to the details of the roof, such as the reflections in the windows, the shadows, and the highlights.
Remember, when drawing a car, it’s important to pay attention to the proportions and details.
Keep practicing, and soon you’ll be able to draw a car’s roof with ease.
- STEP 2

To complete the outline of the car and the front of the car, you can follow these steps:
Start by sketching out the basic shape of the car, including the roof, the windshield, and the side windows.
This will give you an idea of where the front of the car will be located in relation to the rest of the car.
draw the outline of the front of the car.
This typically includes the hood, grille, headlights, and bumper.
Be sure to pay attention to the proportions and make sure that the front of the car looks realistic.
Next, add details to the front of the car. Draw the headlights, grill, and other features of the car’s front end.
Be sure to pay attention to the details of the car, such as the reflections in the windows, the shadows, and the highlights.
-
STEP 3
To sketch out the wheels of a car, you can follow these steps:
Start by drawing two identical circles for the wheels.
The size of the circles will depend on the size of the car you are drawing, but they should be relatively similar in size and shape.
Once you have the circles, sketch out the details of the wheels.
Next, add shadows and highlights to give the wheels a more realistic and detailed look.
Use a darker pencil or pen to add shadows and a lighter one to add highlights.
Keep practicing, and soon you’ll be able to draw a car’s wheels with ease.
- STEP 4

To depict the outline of the side window of a car, you can follow these steps:
Start by sketching out the basic shape of the car, including the roof, windshield, and side windows.
This will give you an idea of where the side window will be located in relation to the rest of the car.
Once you have the basic shape of the car, use smooth and rounded lines to draw the outline of the side window.
The shape of the window will depend on the type of car you are drawing, but it should be relatively similar in size and shape.
Next, add details to the side window.
This can include the window frame, door handle, and any other features that are on the side of the car.
Be sure to pay attention to the details of the car, such as the reflections in the windows, the shadows, and the highlights.
Finally, use an eraser to clean up any lines that you don’t want in your final drawing.
You can also use different pencils or pens to add shading and create a more realistic and detailed drawing.
-
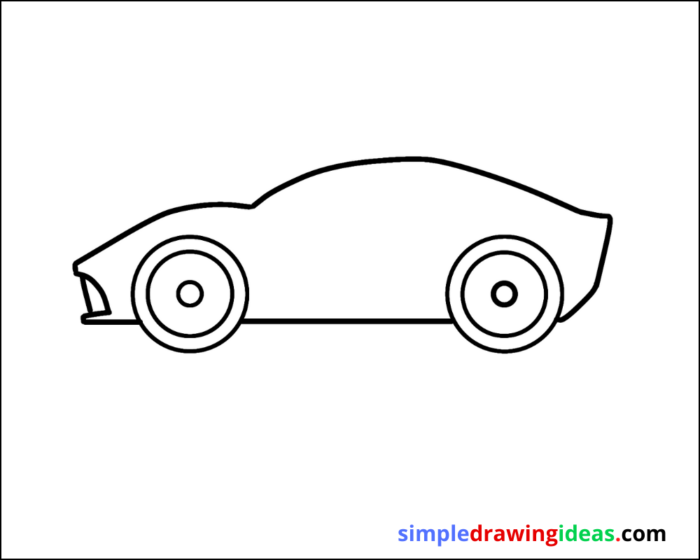
STEP 5

To sketch out the side door of a car, you can follow these steps:
Start by sketching out the basic shape of the car, including the roof, windshield, and side windows.
This will give you an idea of where the side door will be located in relation to the rest of the car.
Once you have the basic shape of the car, use smooth lines to draw the outline of the side door.
The shape of the door will depend on the type of car you are drawing, but it should be relatively similar in size and shape.
Next, add details to the side door. This can include the door handle, door panel, and any other features that are on the side of the car.
You can also use different pencils or pens to add shading and create a more realistic and detailed drawing.
STEP 6

Color the car.
Choose any colors you like.
Conclusion
In conclusion, drawing a car can be a fun and challenging endeavor that requires attention to detail, patience, and a bit of practice.
By following the steps outlined in this guide, you can learn how to draw a car from start to finish, including the roof, front, wheels, side window, and side door.
Remember to pay attention to the proportions and details, use smooth lines and pay attention to the shadows, highlights, and reflections.
Keep practicing and experimenting with different techniques, and soon you’ll be able to create a realistic and detailed illustration of a car.
With each practice and each new car you draw, you’ll be improving your skills and expanding your artistic ability.
More videos:
- How to draw an eye easy
- How to draw a pineapple
- How to draw grapes for beginners
- How to draw Spiderman easy
Keywords:
how to draw, drawing, easy drawing, learn to draw, simple drawing ideas, simple drawing, drawing ideas,
things to draw, stuff to draw, how to draw a car, cardrawing, easy car drawing, how to draw a car step by step.