Drawing is a fun and creative activity that can be enjoyed by people of all ages.
It is also a great way for kids to express themselves and develop their artistic skills. In this guide, we will show you how to draw easy scenery step by step.
We will cover different techniques and tips that will help children create beautiful landscapes and nature scenes.
Whether your child is a beginner or has some drawing experience, this guide is sure to provide valuable information and inspiration.
For more drawing videos, you can visit my youtube channel: Easy Drawings.
From simple shapes and lines to more advanced techniques like shading and perspective,
How to draw easy scenery for kids
We will walk you through the process of creating beautiful and easy-to-draw scenery.
So grab some paper and a pencil, and let’s get started on an exciting artistic journey!
Materials:
Pencil – Paper – Eraser – Coloring supplies
Time needed: 20 minutes.
- STEP 1
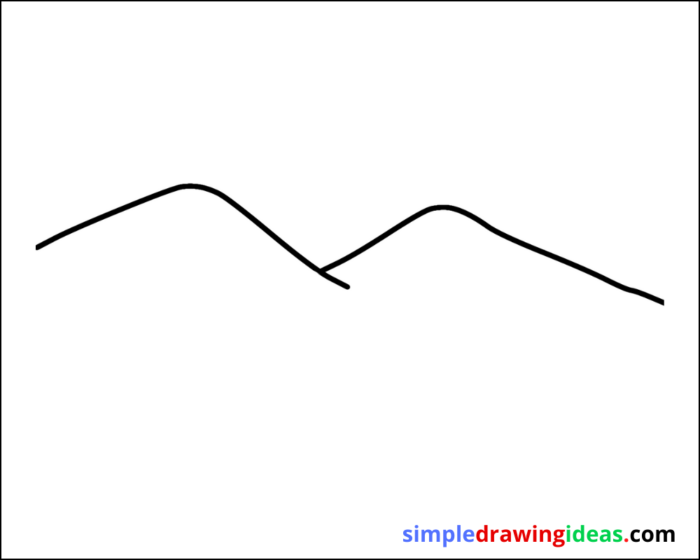
Drawing mountains can be a bit tricky, but with some practice and the right techniques, you can create beautiful and realistic mountain landscapes.
Sketch the basic shape of the mountain. This can be done by drawing a large triangle or a series of overlapping triangles. Use light lines and a pencil so that you can easily erase or make changes later on.
Add details to the mountain. Use different pencil strokes to create texture and depth. Draw in the rocky cliffs, jagged peaks, and any other details that you want to include.
Add shadows. Use a pencil to sketch in shadows where the sun would hit the mountain. This will give your mountain a more realistic and 3D look. Remember that the shadows will be longer and cooler on the side of the mountain facing away from the sun.
Add color. You can use colored pencils, markers or paints to color your mountain. You can make the mountain look realistic by using different shades of brown, gray, and green. Or you can make it look more abstract by using bright colors.
-
STEP 2

Decide on the position of the sun. Think about where the sun would be in relation to the mountain, and decide on its position in the sky.
Sketch the basic shape of the sun. This can be a simple circle or a more complex shape, depending on the style of your drawing.
Add details to the sun. Depending on the style of your drawing, you can add details like sun rays, clouds, or a more detailed shape of the sun.
Add color. Use yellow, orange, and other warm colors to give the sun a bright and sunny appearance. You can also add different shades of yellow and orange to create a more realistic sun.
Add shadows. The sun will cast shadows on the mountain and surrounding area. Use a pencil to sketch in the shadows and make sure they are consistent with the position of the sun.
-
STEP 3

To add a floor to your mountain landscape, you can follow these steps:
Sketch the basic shape of the floor. This can be a flat surface, a slope or a series of undulating shapes. Depending on the perspective of your drawing, the floor can be close to the viewer or far away.
Add details to the floor. Depending on the type of floor you want to create you can add details like rocks, grass, soil, water or other elements. Use different pencil strokes to create texture and depth.
Add shadows. Use a pencil to sketch in shadows where the sun would hit the floor. This will give your floor a more realistic and 3D look. Remember that the shadows will be longer and cooler on the side of the floor facing away from the sun.
Add color. You can use colored pencils, markers or paints to color your floor. You can make the floor look realistic by using different shades of brown, green, and blue. Or you can make it look more abstract by using bright colors.
-
STEP 4

To add water to your mountain landscape, you can follow these steps:
Sketch the basic shape of the water. This can be a lake, a river, or a waterfall, or any other type of water feature that you want to include in your scene. Use light lines and a pencil so that you can easily erase or make changes later on.
Add details to the water. Use different pencil strokes to create the texture of the water. You can add ripples, waves, or a more detailed look to the water.
Add shadows. Use a pencil to sketch in shadows where the sun would hit the water. This will give your water a more realistic and 3D look. Remember that the shadows will be longer and cooler on the side of the water facing away from the sun.
Add color. You can use blue, green, or other cool colors to give the water a natural look. You can also add different shades of blue and green to create a more realistic water.
Add reflections. Water reflects the surrounding elements, so you can add reflections of the mountain, trees, and sky on the surface of the water. This will create a more realistic and interesting look.
-
STEP 5

Coloring a drawing can be a fun and creative process that can bring your drawing to life.
Choose your colors carefully: Before you start coloring, choose your colors carefully. Consider the mood and atmosphere you want to create, and select colors that will help you achieve that.
Conclusion
In conclusion, drawing a mountain landscape can be a fun and creative activity that can be enjoyed by people of all ages. It’s a great way to express yourself and develop your artistic skills. With the right techniques and materials, you can create beautiful and realistic mountain landscapes. Starting with basic shapes, adding details, shading and coloring are the key steps to create a beautiful mountain landscape. Also, you can include elements like the sun, floor, and water to create a more interesting and realistic scene. Remember that drawing is a process and it’s okay to make mistakes. Encourage yourself or your child to keep practicing and experimenting with different techniques to improve their skills and express their creativity.
More videos:
- How to draw an eye easy
- How to draw a pineapple
- How to draw grapes for beginners
- How to draw Spiderman easy
Keywords:
how to draw, drawing, easy drawing, learn to draw, simple drawing ideas, simple drawing, drawing ideas,
things to draw, stuff to draw, how to draw scenery, scenery drawing, easy scenery drawing, how to draw a scenery step by step.

