How to draw a cherry
How to draw a cherry step by step
In this drawing lesson, you will learn How to draw a cherry step by step.
This simple instruction will consist of six steps.
For more drawing videos, you can visit my youtube channel: Easy Drawings.
In today’s lesson, we will talk about how to draw a cherry.
The cherry is a fruit. It is a deciduous tree found in mountainous regions of the world. The cherry tree has small sprays of pink, red or purple flowers at its spring, summer, and autumn months.
How to draw a cherry step by step for beginners
Materials
- Pencil
- Paper
- Eraser
- Coloring supplies
Time needed: 30 minutes.
- Step 1

Draw the outline of the cherries’ legs.
Then make curved lines up and down to show the shape of the legs.
- Step 2
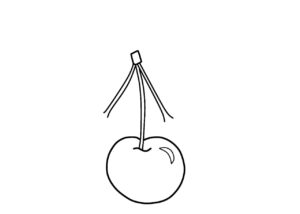
Draw the outline of one berry.
To complete this simple step, you need to draw one circle apple at the bottom of the drawing.
- Step 3
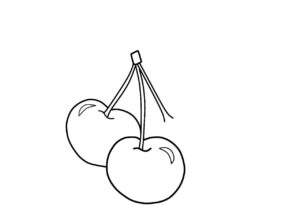
Outline the second cherry.
Next to the circle you just drew, draw another circle on the right side.
- Step 4

Start drawing the cherry leaves.
Draw a curve to the right of the shape you just drew.
Now he needs to draw two curves on either side of the previous curve.
Add veins to the cherry blossom leaves.
Add leaf veins in the form of curves to make the cherry leaves look more realistic.
- Step 5

Add a third apple
- Step 6

Color the drawing.
To color this cherry, use red ,brown
I always draw, but my drawings are bad.. What should I do to master drawing?
Becoming a master of drawing takes time, patience and a lot of practice.
Here are some pointers to help you make better drawings:
Study the basics: Start by learning the basics of drawing, including proportion, perspective, and shading. This will provide a strong foundation for your future drawings.
Observe and practice: Study objects and scenes from your everyday life, and try to recreate them on paper. Pay attention to the way light falls on objects and the shadows they cast.
Play around with various materials: Examine several papers, pencils, and other sketching supplies to determine which you prefer to use.
This might also assist you in creating your own personal style.
Study the skills of master painters by looking at their creations.
See if you can use their strategies in your own work by trying to understand how they created specific results.
Get opinions: Present your work to others and get helpful critique.
This may both show you where you need to make improvements and offer you an idea of what other people find appealing about your work.
Keep practicing: Remember, the key to getting better at drawing is to practice regularly. Set aside time each day or each week to work on your drawings.
Have fun: Finally, it’s important to enjoy the process of drawing. Avoid obsessing over getting your drawings quite right and don’t be scared to explore and try new ideas.
You will witness an improvement in your skills with practice.
Just keep in mind to be persistent and patient while having fun!
There’s no doubt that sketching may be a source of revenue. There are several methods to profit from your sketching abilities, such as:
Work for hire: You may give your drawing talents to people or companies who want drawings, logos, caricatures, or other sorts of artwork.
Selling original artwork: If you produce one-of-a-kind sketches or paintings, you may offer them online or through galleries to particular buyers.
You can provide permission to businesses to use your images or drawings in their goods, ads, or other commercial endeavors.
Teaching: You may make money by instructing others in the art of drawing in a traditional classroom environment or online.
It’s important to remember that earning a living as an artist may be difficult and unreliable.
However, many artists have been able to transform their passion for sketching into a lucrative career with perseverance, effort, and a great portfolio.
How can I create a realistic face and portrait?
Although drawing a realistic portrait and face might be difficult, it is possible with experience and close attention to detail.
Follow these steps to get started:
1.Using a pencil and a light touch, sketch the basic contour of the head, including the eyes, nose, mouth, and ears.
2. Include additional details: After determining the basic contour of the face, begin including features like hair, brows, eyelashes, wrinkles, and eyelashes.
The dimensions of the face, such as the distance between the eyes and the distance from the nose to the mouth, should be taken into account.
3.Shadow and blend: Start shading the face to give it depth and definition once you have added all of the elements.
To even out the shade and combine the various values, use a blending tool, such as a blending stump or your finger.
4.Add highlights and shadows: Highlight and shade the cheekbones, temples, and region beneath the chin to give the image a more realistic appearance.
5. Refine and adjust: Once you have finished shading, step back and look at the portrait as a whole. Make any necessary adjustments to improve the overall look of the portrait.
Always take your time and pay attention to the details while creating realistic portraits.
Don’t be scared to try new things and fail.
You’ll improve and be able to paint portraits that are more realistic and in-depth as you practice.
Last but not least, if you’re seeking for inspiration, think about looking at the portrait-focused modern or old master paintings.
You may learn a lot about how to make your own portraits by looking at their methods and styles.
More videos:
Keywords:
how to draw, drawing, easy drawing, learn to draw, simple drawing ideas, simple drawing, drawing ideas,
things to draw, stuff to draw, how to draw Earth, Earth drawing,
easy Earth drawing, how to draw Earth step by step.