How to draw a tent
How to draw a tent step by step
In this drawing lesson, you will learn How to draw a tent step by step.
This simple instruction will consist of six steps.
For more drawing videos, you can visit my youtube channel: Easy Drawings.
In today’s lesson, we will talk about How to draw a tent.
Through the following steps, follow us and we wish you an enjoyable reading,
Drawing a tent is simple, but there are many things to consider when you go on to create one. Maybe your tent needs to be large enough so that your friends and family can get inside, but not so big they take up too much space!
A tent can be used for sleeping, sheltering from the sun or rain, or as a place to prepare food. It is important to take into account the effect that lighting can have on your drawings, so don’t forget that there are different angles from which you can see what’s inside a tent; whether it’s at night or early morning when the sun isn’t as strong.
How to draw a tent step by step for beginners
Materials
- Pencil
- Paper
- Eraser
- Coloring supplies
Time needed: 30 minutes.
- Step 1
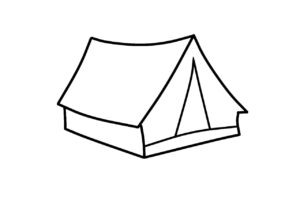
Outline both sides of the tent.
Use curves of different lengths to represent the figure as shown.

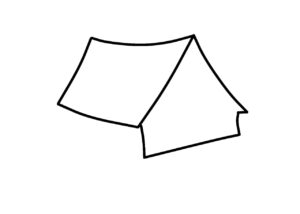
- Step 2

Add an entrance to the tent.
Add a curve to the left side of the shape you just drew.
- Step 3
Sketch out the door of the tent.
Sketch out the door of the tent. It should be a simple,like a picture
- Step 4
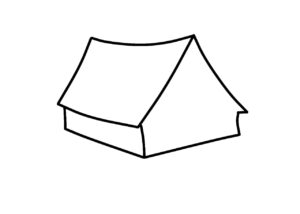
Add more to the outline of the tent. For the sides, use smooth lines that are close to the jagged lines you drew earlier.
- Step 5
Now you can add the final details to your tent drawing. A tent wouldn’t be very effective without a door. Then you can use some straight lines in it to indicate the inside of the tent.
- Step 6
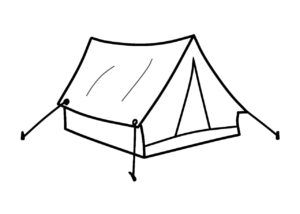
Finish fixing the tent.
Draw some straight lines connecting the ends of the tent to the brackets.
What are some ways to create texture in a drawing?
There are several ways to create textures in your drawing. Here are some of them:
Hatching and cross hatching:
This involves drawing closely spaced parallel or intersecting lines to create the illusion of texture and depth.
Punctuation:
This involves using tiny dots to create the illusion of texture often used for drawing shadows and highlights.
slide:
This involves drawing short, loose, broken strokes across an area to create a rough or grainy texture.
Scratches and Bleeds:
This includes using tools such as: B. Rub graphite or charcoal with your finger or a blending tool to create a soft, smooth texture.
impression:
This involves using an object such as an eraser or pencil to press down on the paper to create an imprint, which is then filled in to create a textured area.
Combining Techniques:
Mixing and combining different textures allows for more dynamic drawing and helps create a more convincing illusion of depth and shape.
Remember, the key to creating effective texture in a drawing is to experiment with different techniques and materials, and to understand the properties of each medium you are using.
How do you develop your talent in drawing?
Whether you’re just starting out or you’ve been drawing for years and want to refine your skills, there are lots of ways to improve your drawing abilities. Here are some of the best:
Talent in drawing is a natural talent. It happens if you are given the right environment, which makes it easy to draw. If you are given the right environment, you will develop your talent in drawing.
Develop your talent in drawing with a healthy habit of sketching. Make a habit of drawing every day. Sit quietly, close your eyes and just think about what you saw or felt yesterday. Draw simple lines and shapes to capture the essence of what really happened-it’s that simple!!
Like many other skills, drawing is a skill that can be taught. There are books and tutorials to help you along the way. Also, don’t forget about using models when you’re trying to improve.
The best way to develop your talent in drawing is to follow a basic foundation and learn from experienced artists. Practice at a nearby art center, library or community center and follow tutorials available online.
You can make gains in drawing through practice and talent. However, practice is often about repetition, applying techniques and methods until your muscle memory takes over. If you keep striving towards developing your skills, it’ll pay off in the long run.
I have no ideas for drawing and I don’t know what to draw.. What should I do?
When you want to draw but don’t know what to draw, here are some tips that can help you out. All of us draw what comes to mind. Your mind is full of creative expressions and it is your gift.
You have no idea what to draw? Don’t worry, start simply with an empty canvas. Try to make shapes and add small details to your artwork, until you gain momentum and inspiration for more complex drawings. If you feel stuck:\(o)are your skills and interests still correct? If you are ready for something more demanding than a small piece of paper or canvas, try a pencil drawing on cardboard.
Drawing is a very meditative way to learn, because it forces you to quiet your mind and just think about what you are drawing. While you are thinking about the drawing, you will realize how to draw whatever you want. You can take up anything around you as this would help you improve your skills of drawing everyday.
Before you can draw anything, you need to first understand how to use and create shapes. For example, learning how to create diamonds can help you look at other shapes and see if they are similar or not. Learning how to make lines and shading is a great idea as well, but each skill can be learned independently.