Hello guys and welcome back, In this drawing lesson, you will learn how to draw a cherry step by step.
This simple instruction will consist of six steps.
For more drawing videos, you can visit my youtube channel: Easy Drawings.
How to draw a cherry step by step
By following this easy step-by-step guide on how to draw a cherry, you can master the technique of sketching and rendering a cherry as the central focus of your artwork.
Additionally, you can also apply these skills to create a realistic image of a cherry tree, or a garden with cherry blossoms.
Materials
- Pencil
- Paper
- Eraser
- Coloring supplies
Time needed: 20 minutes.
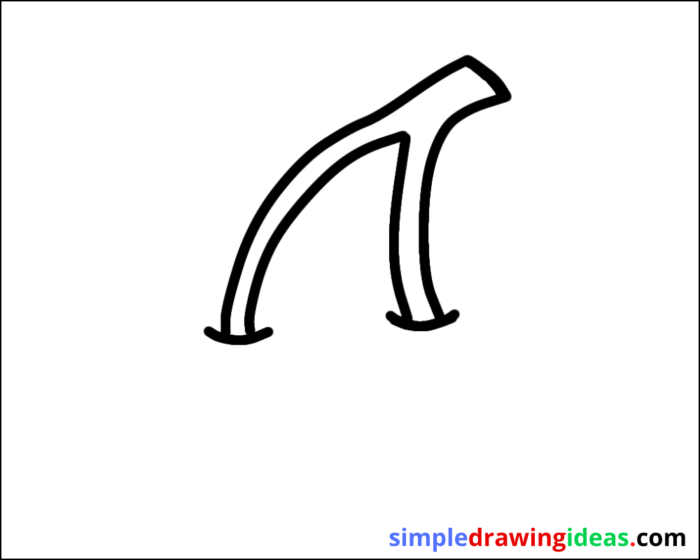
STEP 1

To sketch out the legs of the cherries, you can use thin and delicate lines to indicate the stem and branches.
Start by drawing a thin, straight line from the base of the cherry to the top of the stem.
From the top of the stem, draw small branches coming out to the left and right, creating a Y-shape.
STEP 2
To add elements at the top of the cherry, near the ends of the previously drawn curved lines, you can sketch in a shape as follows:
This shape should be slightly smaller than the main body of the cherry, and it will represent the cherry’s top, or cap.
Keep in mind that the shape of the cap can vary depending on the type of cherry you are drawing, so you can experiment with different styles and techniques to achieve the desired outcome.
STEP 3
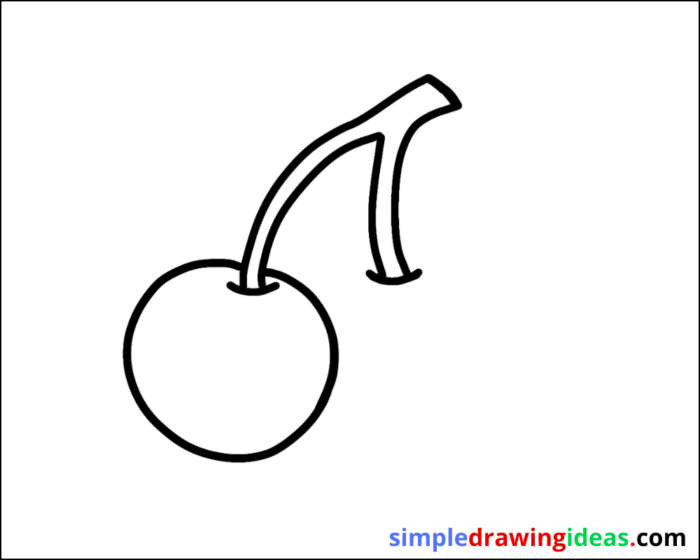
Start by sketching a small, round shape for the apple’s base.
Next, use a pencil or pen to draw a perfect circle around the base shape.
STEP 4

put a new circle Like the one in the picture
step 5
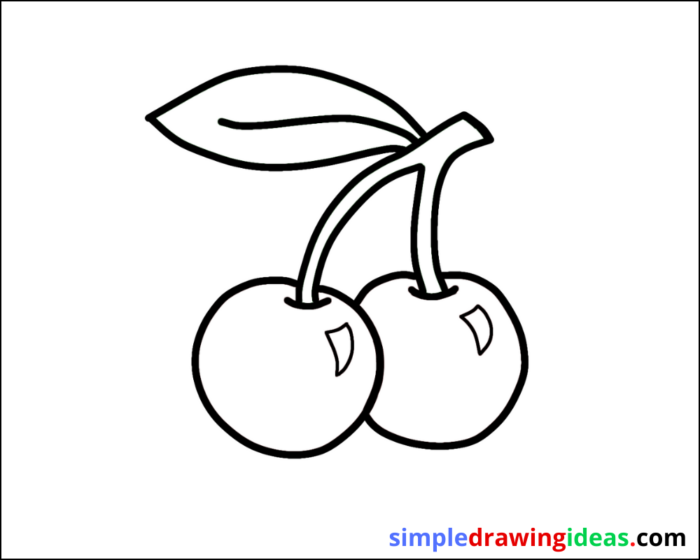
To draw a rose above the cherry leaf:
Start by sketching a small, round shape for the rose’s base.
Sketch the shape of the petals using curved lines, starting from the base and working your way outwards.
Add details such as wrinkles and shadows to give the petals depth and realism.
Sketch in the stem and leaves of the rose.
You can add more details such as thorns or shadows to make the rose more realistic.
Keep in mind that roses and cherry leaves can come in different varieties, so you may have to adjust the shape or details accordingly.
STEP 6
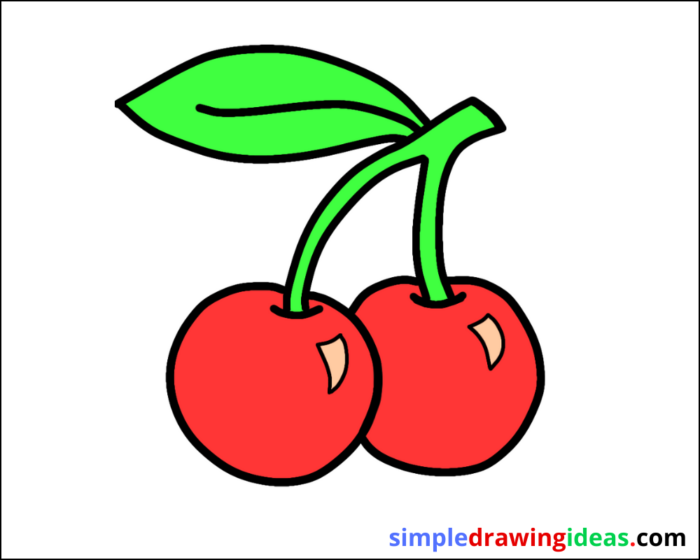
To add color to this cherry drawing, you can use a combination of brown, green, red, or pink hues.
Drawing skills
Drawing is an incredibly versatile and expressive art form that has been enjoyed by people of all ages and cultures for centuries. It is a way to visually communicate ideas and emotions through the use of line, shape, form, and color.
To start drawing, all you need is a pencil and a piece of paper. From there, you can begin experimenting with different techniques and styles to find what works best for you. Some popular drawing techniques include sketching, which is the process of creating a rough, informal drawing, and rendering, which is the process of creating a detailed and polished drawing.
One of the great things about drawing is that it is a relatively low-cost hobby. You don’t need expensive equipment or a studio space to get started, and you can work on your drawings anywhere, at any time.
With practice and determination, you can develop your skills and create beautiful, unique artwork.
In addition to being a fun hobby, drawing can also be a valuable skill. Many professions such as architects, graphic designers, fashion designers, and illustrators, require the ability to create detailed drawings. Whether you’re a beginner or an experienced artist, drawing can be an enjoyable and rewarding pursuit.
How can I incorporate other elements such as leaves and branches to create a more complete and realistic cherry drawing?
Incorporating other elements such as leaves and branches can help create a more complete and realistic cherry drawing. Some ways to incorporate these elements include:
Sketching in the branches and leaves of the cherry tree. This can help create a sense of context and environment for the cherry.
Using the branches and leaves to create depth and perspective in the drawing. For example, drawing the branches and leaves in the foreground in more detail, and the ones in the background with less detail, to create the illusion of depth.
Using the branches and leaves as a framing device to create a more dynamic composition. This can help draw the viewer’s eye to the cherry and create a sense of movement in the drawing.
Using the branches and leaves to add a sense of realism and naturalism to the drawing. For example, drawing the branches and leaves in a way that reflects their natural growth patterns and movements.
Using the branches and leaves to add a sense of season or time of day. For example, drawing the branches and leaves with a yellow or orange hue to create a fall season or drawing the branches and leaves with shadows to create a sense of morning or evening.
Keep in mind that the branches and leaves can be drawn in different ways, you can use a realistic or stylized approach depending on your preference. Experimenting with different styles and techniques to achieve the desired outcome.
How can I use color to enhance the overall look and feel of my cherry drawing?
Using color can greatly enhance the overall look and feel of your cherry drawing. Some ways to use color effectively in your cherry drawing include:
- Using a limited color palette to create a cohesive and harmonious image. For example, using shades of red, pink, and green for the cherry, and brown for the branches and leaves.
- Using color to create the illusion of depth and volume. For example, using a darker shade of red for the cherry in the foreground, and a lighter shade for the cherry in the background to create the illusion of depth.
- Using color to create a sense of mood or atmosphere. For example, using warm colors such as orange and yellow to create a sense of warmth and vitality, or cool colors such as blue and green to create a sense of calm and serenity.
- Using color to create a sense of time of day or season. For example, using warm colors such as orange and yellow to create a sense of sunset or fall, or cool colors such as blue and green to create a sense of morning or spring.
- Using color to create contrast and emphasis. For example, using a bright, bold color for the cherry to make it stand out against the background.
Keep in mind that color can be used in many different ways, and the best approach will depend on your personal style and the overall look and feel that you want to achieve. Experiment with different color combinations and techniques to find what works best for you.
Cherry drawing step by step
Drawing a cherry can be a fun and rewarding experience.
By following simple steps and techniques, you can learn how to sketch and render the cherry and its leaves and branches in a way that captures its unique characteristics and details.
Additionally, by incorporating other elements such as leaves and branches, and by using color effectively, you can create a more complete and realistic cherry drawing that captures the essence of the subject.
Whether you are a beginner or an experienced artist, there are always new things to learn and explore when it comes to drawing a cherry. With practice and determination, you can master the art of sketching, rendering and coloring the cherry.
More videos:
- How to draw an eye easy
- How to draw a pineapple
- How to draw grapes for beginners
- How to draw Spiderman easy
Keywords:
how to draw, drawing, easy drawing, learn to draw, simple drawing ideas, simple drawing, drawing ideas,
things to draw, stuff to draw, how to draw a cherry, cherry drawing, easy cherry drawing, how to draw a cherry step by step.